Stone cladding that looks solid in October can start releasing from the wall after its first hard freeze. Field experience shows the cause is rarely the stone itself. It is almost always the fixing layer, the part that catalogues photograph least.
Why the first freeze is the real test
Water finds its way behind every stone panel, through hairline joints, open perimeter sealant and the edges of the bed mortar. When that water freezes it expands by roughly nine percent, and the pressure works outward against the bond line. A single cycle may do little, but repeated freeze-thaw cycles fatigue the adhesive and the substrate until the panel lets go. Many installers have seen failures in the first winter, which is why the first freeze matters so much.
The problem is compounded by thermal movement. Stone, mortar, the substrate and any insulation layer all expand and contract at different rates. Without a detail that accommodates this movement, shear stress concentrates at the weakest point, usually the adhesive line where the panel meets the wall.
The fixing detail catalogues leave out
Product brochures show finished stone with clean joints and rarely show what sits behind the panel. The detail that matters has three parts: a mechanical support system, a drained cavity and a controlled bed. Adhesive alone should never carry the weight of heavier natural stone, and manufacturers of stone veneer systems generally specify stainless steel anchors or a rail system in addition to any bonding mortar. Check the datasheet for the load rating and freeze-thaw classification of the exact product you are installing.
A ventilated or drained cavity is the second element. It lets water that gets past the outer joints drain down and out at a weep point, rather than sitting against the substrate. The third element is a properly prepared bed: a clean, sound substrate, the right mortar mix and a bond that has been tested before the wall is closed up. Shortcuts at any of these layers become the failure point a year or two later.
How to specify a durable stone cladding system
Start with the substrate. If the wall is render over EPS or an insulated system, the fixings must reach a load-bearing structure, not just the insulation. Anchors pulled through foam will fail under wind load long before any freeze occurs. Once the substrate is confirmed, specify the fixing schedule: anchor spacing, embedment depth, and the number of anchors per panel. Ask the installer to show this schedule on paper before work begins.
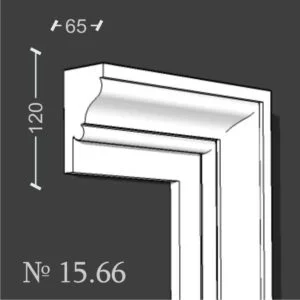
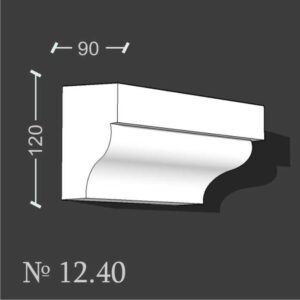
Next, detail the drainage. Specify a continuous drip at the base of the cladding, weep holes at the bottom course and sealed but breathable joints. Where the stone meets a window sill or a projecting element, a sloped top surface and a drip edge stop water from running behind the panel. Decorative surrounds and trim on the same elevation, including EPS elements such as decorative window sills, need the same discipline, since any gap at their junction with stone becomes a water path.
| Fixing method | Typical use | Freeze-thaw risk | Relative cost |
|---|---|---|---|
| Adhesive-only mortar bed | Thin veneer on masonry | High if bond fails | Low |
| Mechanical stainless anchors with clip rail | Heavy natural stone | Low when correctly spaced | Medium |
| Rail system with ventilated cavity | Large format panels | Lowest, drains and dries | High |
| Stone glued to EPS base | Lightweight decorative panels | High without mechanical support | Low to medium |
Checking existing stone cladding in 15 minutes
If you already own a stone-clad facade, you can detect early loosening without specialist equipment. Tap each panel with a coin or knuckle and listen for a hollow sound, which indicates debonding. Look for hairline cracks radiating from the anchor points, staining at the joints, and gaps forming at the base of the wall. Pay attention after freezing weather, when movement is most likely to show.
Any panel that moves under light pressure should be removed and refixed by a qualified installer. Do not simply fill the gap with sealant, because that traps moisture behind the stone and speeds up the next failure. If several panels are affected, assume the fixing system was under-specified across the whole elevation and have it surveyed.
Cost and where to spend it
Mechanical anchors and a rail system add a noticeable share to both material and labour compared with adhesive-only work. That premium is real, but it is small against the cost of removing detached cladding, making the wall safe and reinstalling. Field experience shows the cheapest moment to get the fixing right is before the first panel goes up, not after the first freeze.
Where the design calls for a lighter, more decorative look, you can achieve a similar visual effect with lightweight EPS elements. Architectural options such as EPS quoin corners or decorative columns give a stone-like reading at a fraction of the weight, removing the load problem altogether. Choose the material based on what the substrate and climate can actually support.
For related reading on how water finds weak points in a facade, see how the base course soaks up rain before the wall does, which covers the drainage logic that applies equally to stone cladding.
What to ask your installer before the first panel goes up
Request the fixing schedule, the anchor type and embedment depth, the cavity and drainage details, and the mortar or adhesive datasheet with its freeze-thaw rating. Ask how the bond will be tested and when. A competent contractor will answer these questions readily and will not object to a written specification. The sensible approach is to treat the fixing detail as the most important line on the drawing, because it decides whether the stone stays on the wall through its first winter and every winter after.